Tuesday, May 31, 2011

Tuesday Tutorial {thank you notes-book DIY}

are you a reluctant thanker?
maybe this DIY will cure any "forgetfulness"...
this is easy, useful, and pretty!

ingredients:  
1. manila folder 
2. scissors
3. scrapbook paper 
4. adhesive (glue stick or tape runner)
5. 6X9 mini clipboard

directions:
take your manila folder and fold it in half. i used a used one -upcycle!

 close it how it normally closes while it is folded in half

cut or slice the right side off to fit your clipboard


use adhesive to cover the outside with scrapbook paper and cut to fit

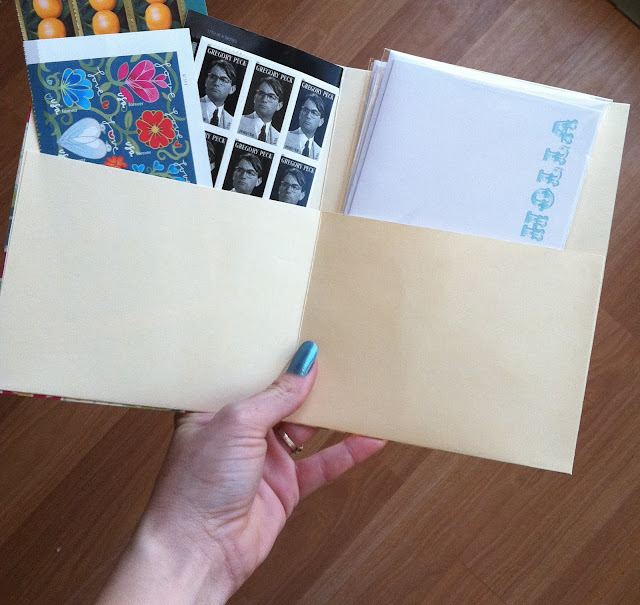
add your thank you cards, stamps, and what have you

place it in your clipboard
and now your "good to go"...  for reals!
put it in your purse and write thank you notes while 
sitting at gymnastics, swim lessons, doctor's office... etc.

i have all my contacts in my phone so i'm all set.

now address your cards, and mail them off :)

happy crafting!
xoxo,

Monday, May 30, 2011

finding beauty

we are surrounded by it - really.
sometimes it's hard to see.
buried in laundry, dishes, housework -beauty?
these really are blessings - thank God we have clothes to wear, dishes to eat on, and a home to live in
-i've heard/read that a million times - so it's kinda lost it's power for me,
even though i know it is true.

more empowering for me though, is that mothering, and cleaning up after and raising up these precious children is the most beautiful thing i think i can possibly be given to do! 

the fact that it is so fleeting,
so temporary
shines a new light on the matter...
i can take this gift and complain about it and stomp my feet and pout at the work involved.
or i can stop, enjoy the moments and choose to see the beauty.
i would hate to have missed it.

it will be over one day.
at least this thick, loud, chaotic part will be over - and then what?
will i have done a good job?
i have spent the last few years numb to the mess, noise, discomfort, fighting, disobedience.
now i SEE that the beauty lies in every detail; pain or joy.
bringing a child from pain or sadness to peace through LVE
how beautiful is that?
if i am numb to the pain i am then numb to all of it.

beauty is in everything.
when we choose to see, we find it's been right under our noses.

have an amazing week friends!

Friday, May 27, 2011

Photography Friday: InstaFriday

cutting out labels for a friend's new soap company.

plans! for the creative arcade!!!

Soleil, my painter. She's making a watercolor for me.

Soleil trying on pointe shoes for the first time. 
She has worked so hard, and she's so thrilled to finally go on pointe.

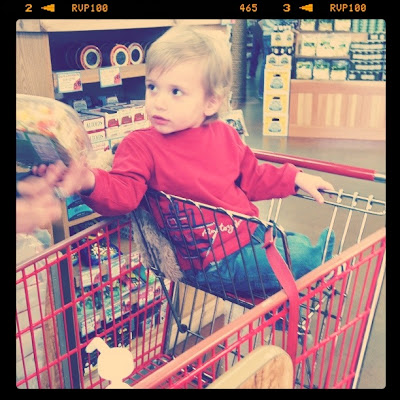
he helps the checker unload the shopping cart every. single. time.
sweet boy.

now he's Mr. Grumpy Pants and doesn't wanna leave mama's arms.

out for a little walk through Urban Outfitters...

seriously love some of their wares.

sigh.

my first iPod. this thing weighs about 15 pounds.
so ancient.

aqua toes in sandals.

TJ's dunkers. 
nothing like homemade.
yet addicting.

pretty flowers for my kitchen.

 thanks for stopping by to see my week in instagram pics.
have a lovely weekend!
Sweet Shot Day

Thursday, May 26, 2011

shop updates

lots of new goodies have been listed,
and now the graphics for playdate cards have their very own page!!!
be sure to check out the new graphics and font i just added!

and here are a few goodies:
retro covered notebooks

happy birthday banners


sew retro monogram stationery


have a wonderful thursday my lovelies!
xoxo,

Wednesday, May 25, 2011

what i love wednesday linky party {No. 17}!!

i am LOVING fonts this week...

i turned the corner downtown the other day and did a double take.
oooo, look at that pretty font. what is it? i just have to know!
later that day as i was printing out a custom order of invites for a dear friend,
it looked like i was using the same font!
i had already been using it for quite a while now
-it was just the red color that threw me off... well until...
i LOVE how they chose to make the letters red.
i LOVE those summer dresses, btw. definitely looking forward to some warmer weather!

here's pica 10 pitch:
get it here

get american typewriter here

can't wait to see what you love this week!
xoxo,

lollipops

Tuesday, May 24, 2011

Tuesday Tutorial {Cutest Backseat Bag Ever}

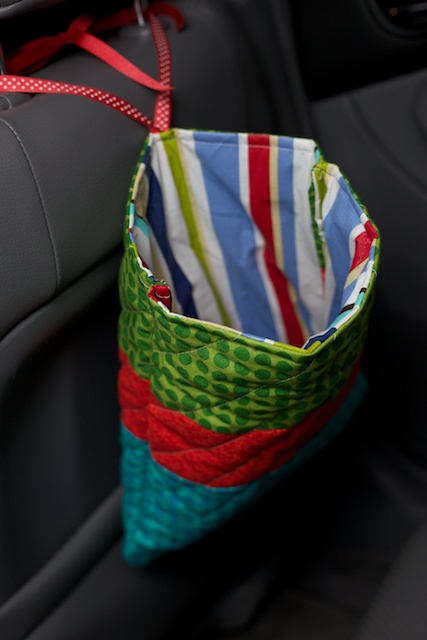
Hi Friends, Francis of Bibeez Baby here and I would love to show you how to make "The Cutest Backseat Bag That You Have Ever Seen". 

I really think you'll like it :-)

I call this a backseat bag, because we mostly use it in the back seat as a Garbage Bag! It can also be used to keep small toys, snacks, books and games at hand on road trips or around town. Or maybe a storage solution in the playroom- hang several bags on pegs. I am also making one to put on the side of my sewing table as a thread catcher. There are so many uses! Note that I recycled a vinyl table cloth in the version I show you here. It's great because I can wipe it clean if the need arises; but it's up to you and what you are making it for. Start to finish it took me about 1 hour, and that included a mishap with my sewing machine and my finger (ouch)! So I'd say no longer than 45 minutes total! Easy-peasy!

Materials Needed:

- 35" of 1/2'' wide ribbon (I used a cute polka dot grosgrain)

- 2 pieces of batting or interfacing 12" x 15" (I like the "fluffy" look of batting)

- 2 pieces of lining fabric 12" x 15" ( I used remnants of a vinyl table cloth so I can easily wipe it clean. You could also laminate your fabric if you'd like)

- 2 pieces of fabric for the outer of the bag

- I made mine patchwork. The sizes of the fabric are as follows:

- 2 pieces 7'' x 12'' ( teal in my bag )

- 2 pieces 5" x 12'' ( green)

- 2 pieces 3.5'' x 12'' (red)

- Coordinating thread

- Scissors

- Sewing Machine (and a heavier needle if you decide to use the vinyl, swap in the heavy needle when you sew everything together.)


Method:


I began by piecing my patch work together using a 1/4'' seam allowance. This gave me two panels 12" x 15". (Don't forget to iron the seams flat when you're done.)


Next I quilted the outer fabric to the batting. This is an optional step- I did quick diagonal lines ranging 1"-2" apart.


The next step is to fold your ribbon in half and pin the folded part to the top of the outer fabric. Now pin the lining fabric and outer fabric right sides together. The ribbon should be sandwiched in between the two pieces of fabric.


Straight stitch around the 4 edges with 1/4" seam, and leave a 3-4 inch opening for turning. Now turn right side out.


Repeat with the remaining outer fabric, batting/interfacing, and lining (except without ribbon this time). Turn right side out.

O.k. we are almost finished now! Top stitch over the opening that you used for turning, and if you desire- topstitch along the very top of each panel.


Now, pin the panels right side (outer fabric) together, and sew on all 3 sides without ribbon.


Turn right side out and....Tah-dah! You have yourself the sweetest backseat bag.


So what do you think? What will you use yours for?

This bag is available in my Etsy shop if you aren't feeling crafty and would like to snatch it up. And if you all like it then maybe I'll add some more!

Oh, by the way- since I am so excited about sharing my first tutorial with you on Lollipops I want to offer all of you lovely folks a fantastic discount. Just enter LOLLIPOPS at checkout to receive a 15% discount!!! The code will only be available until June 3rd --- Hope to be hearing from you soon! Have a great rest of the week!

Best Wishes,

Frances